
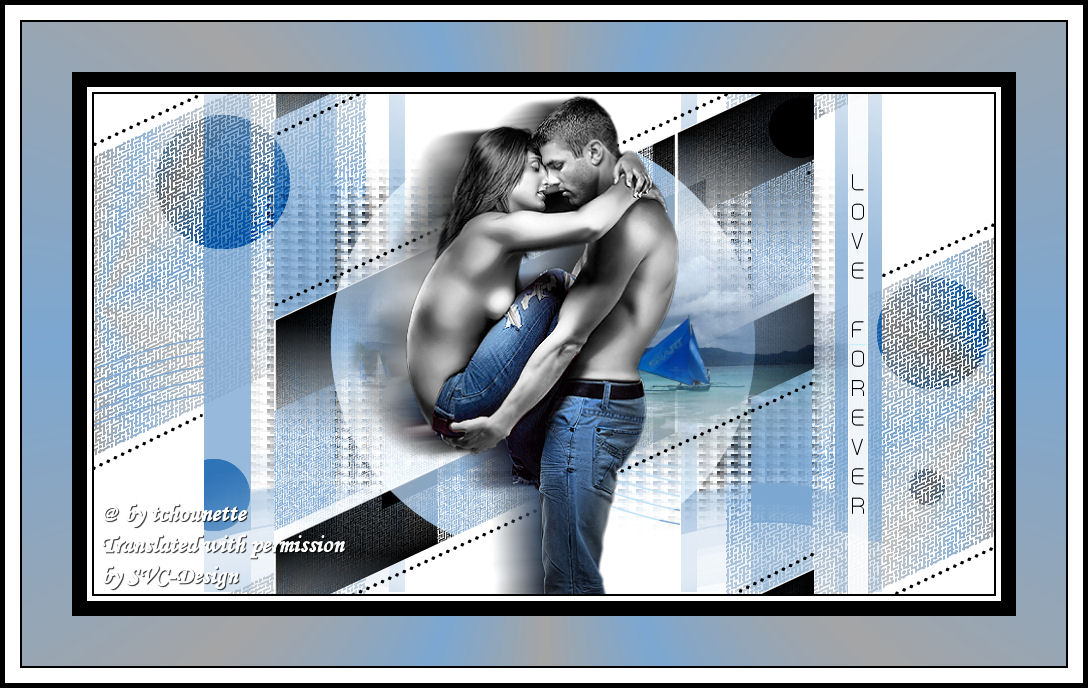
This lesson is made with PSPX9
But is good with other versions.
© by SvC-Design

Materialen Download :
Here
******************************************************************
Materials:
MaskViolette_R37.jpg
MR_Boracay bach.pspimage
TCH-Alpha-Forever.pspimage
TCH-Tuto-Love-Forever.pspimage
TCH-Tuto-Love-Forever-Lignes.pspimage
TCH-Tuto-Love-Forever-Texte.pspimage
******************************************************************
Plugin:
Plugins - Unlimited 2.0 - VM Experimental - Mighty Maze
Plugins - Unlimited 2.0 – Kiwi oelfilter - leinwand
Plugins - Unlimited 2.0 – Kiwi oelfilter - Setzboard
******************************************************************
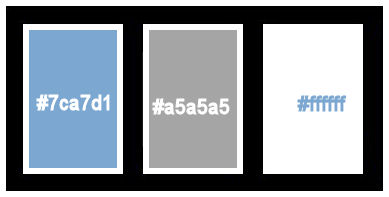
color palette
:
******************************************************************
methode
When using other tubes and colors, the mixing mode and / or layer coverage may differ
******************************************************************
General Preparations:
First install your filters for your PSP!
Masks: Save to your mask folder in PSP, unless noted otherwise
Texture & Pattern: Save to your Texture Folder in PSP
Selections: Save to your folder Selections in PSP
Open your tubes in PSP
******************************************************************
We will start - Have fun!
Remember to save your work on a regular basis
******************************************************************
1.
Open all your tubes in your PSP, duplicate the layers, and close the originals
2.
Open a new transparent image of of 900x500 pixels
3.
Fill the layer with the color #FFFFFF
4.
Place the color # 7ca7d1 in the foreground, and the color # a5a5a5 in the background
5.
Layer – new rasterlayer
Configure your gradient, with the configurations:
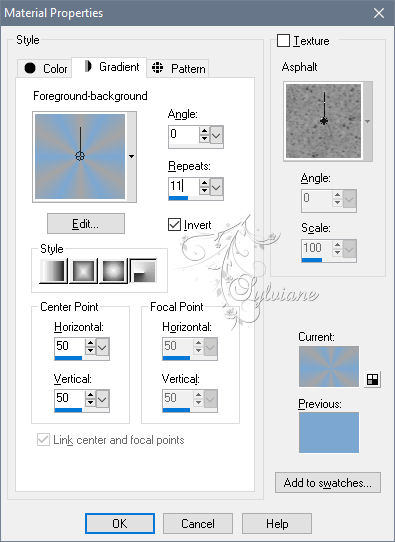
fill with gardient
6.
Image - Resize - 60%
7.
Effects - Image Effects - Seamless Tiling
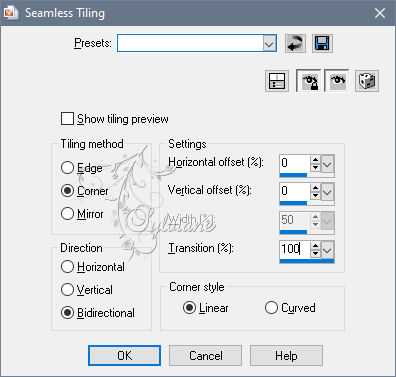
8.
Plugins - Unlimited 2.0 - VM Experimental - Mighty Maze
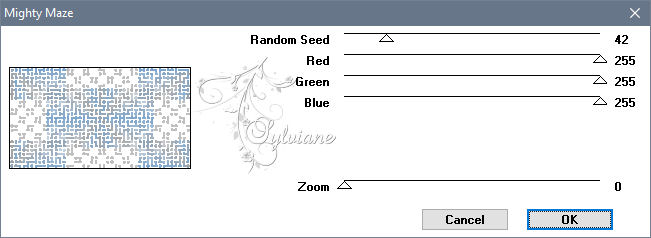
9.
Layers - Duplicate
10.
Click on the eye, to close the layer
11.
Go to the layer below
12.
Effects - geometric effects - skew
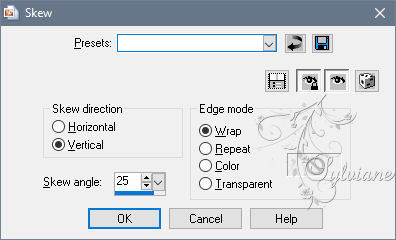
13.
Stay on this layer
15.
New raster layer
16.
Fill with the gradient
17.
Image - Resize – 60%
18.
Adjust - blur - gaussian blur
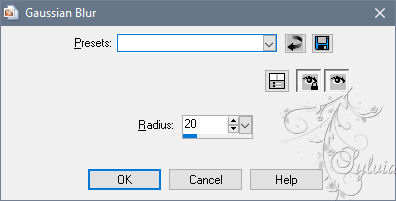
19.
Plugins - Unlimited 2.0 – Kiwi oelfilter - leinwand
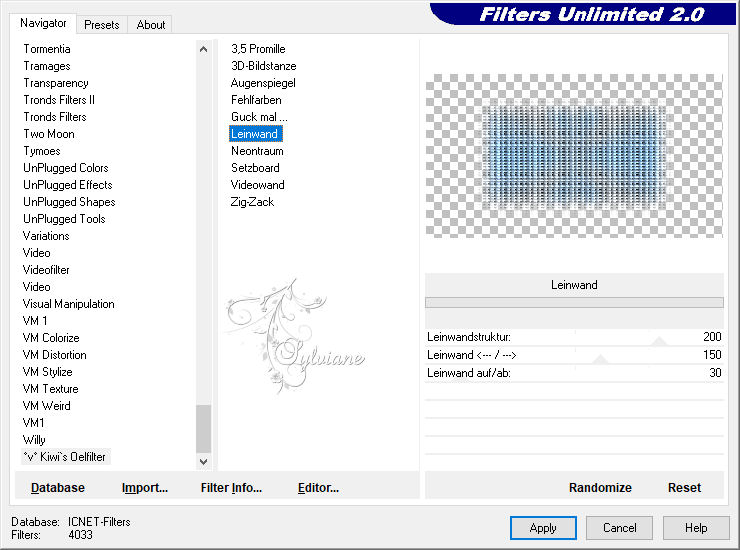
20.
Blend Mode : Luminance ( legacy)
21.
New raster layer
22.
Fill the layer with the color # 7ca7d1
23.
Layers – Load/save mask – Load mask from disk - MaskViolette_R37.jpg
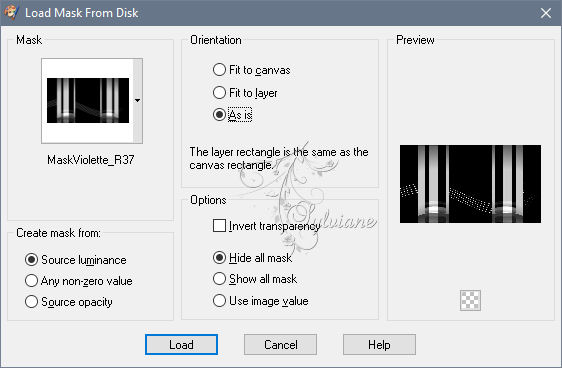
24.
Layers - Merge - Merge Group
25.
Activate the top layer
26.
- Click on the eye to re-open the layer
27.
Plugins - Unlimited 2.0 – Kiwi oelfilter - Setzboard
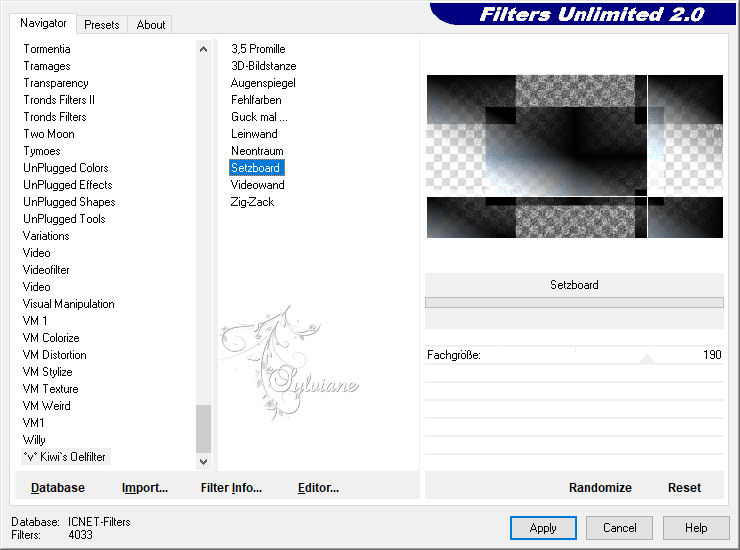
28.
Image - Resize – 60%
29.
Effects - geometric effects - skew
30.
New raster layer
31.
Selections - Load / Save - Load selection from Alpha Channel – selection #1
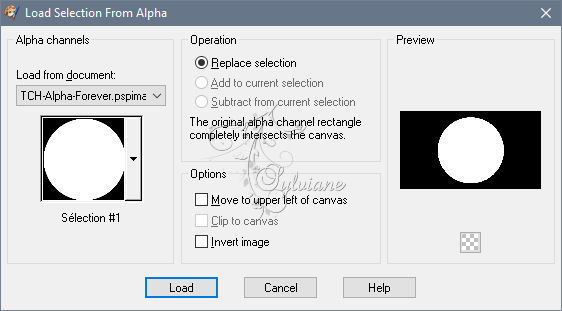
32.
Fill the selection with always the same gradient
33.
Selection - Select None
34.
Blend Mode : Screen
35.
New raster layer
36.
Selections - Load / Save - Load selection from Alpha Channel – seletion #2
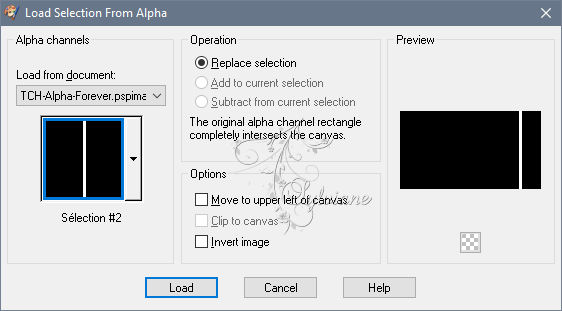
37.
Fill the selection, with the same gradient
38.
Selection - Select None
39.
Blend Mode : Screen
40.
Effects - Edge Effects - Enhance
41.
Open the tube MR_Boracay beach.pspimage
42.
Edit - Copy
43.
Return to your workspace
44.
Edit - Paste as new layer
45.
Image - Resize – 60%
46.
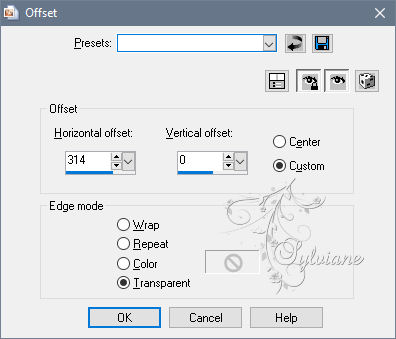
Effects - Image Effects - Offset

47.
New Raster layer
48.
Selections - Load / Save - Load selection from Alpha Channel – selection #2

49.
Place the color # 7ca7d1 in the foreground, and the color # a5a5a5 in the background
51.
Fill the selection with the gradient
52.
Selection - Select None
53.
Effects - Edge Effects - Enhance
54.
Blend Mode : Screen
55.
Open the tube TCH-Tuto-Love-Forever-Texte.pspimage
56.
Edit - Copy
57.
Go back to your work
58.
Edit - Paste as new layer
59.
Effects - Image Effects - Offset
60.
New raster layer
61.
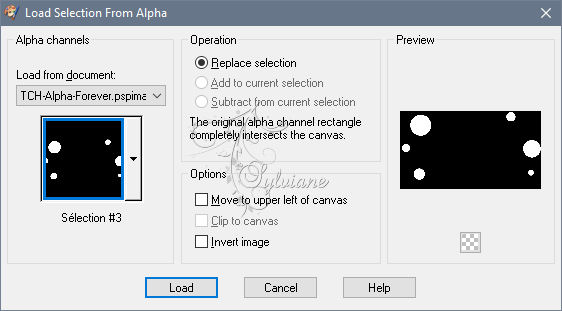
Selections - Load / Save - Load selection from Alpha Channel – selection #3
62.
Fill in the selections, with the color # 000000
63.
Selection - Select None
64.
Blend Mode : Overlay
65.
Open the tube TCH-Tuto-Love-Forever-Lines.pspimage
66.
Edit - Copy
67.
Go back to your work
68.
Edit - Paste as new layer
69.
Open the tube TCH-Tuto-Love-Forever.pspimage
70.
Edit - Copy
71.
Go back to your work
72.
Edit - Paste as new layer
73.
Layers - Duplicate
74.
Go to the layer below
75.
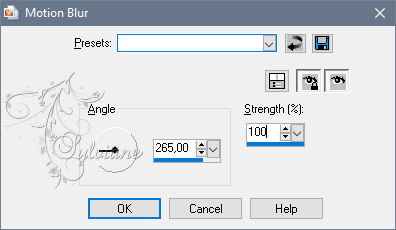
Adjust - Blur - Motion Blur
76.
Go to the top of the layers stack, in the layers palette
77.
Image - Add borders - 2 pixels - Symmetric = checked, Color #000000
78.
Image, Add borders, Size in pixels = 5, Symmetric = checked, Color #FFFFFF
79.
Image, Add borders, Size in pixels = 15, Symmetric = checked, Color # 000000
80.
Image, Add borders, Size in pixels = 50, Symmetric = checked, Color # 7ca7d1
81.
activate the magic wand
and select the borderfrom 50 pixels
fill with gradient
82.
Image, Add borders, Size in pix els = 2, Symmetric = checked, Color # 000000
83.
Image, Add borders, Size in pixels = 15, Symmetric = checked, Color #FFFFFF
84.
Image, Add borders, Size in pixels = 5, Symmetric = checked, Color # 000000
85.
Put your watermerk erop
Put de watermerk on from the auteur
86.
Save as JPEG
Back
Copyright Translation © 2020 by SvC-Design